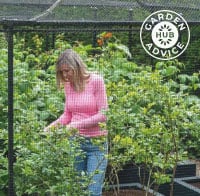
STEPHANIE’S KITCHEN GARDEN UPDATE – JANUARY 2010
January in Stephanie’s Kitchen Garden has been a real stop-start month. I’ve been looking forward to working off the Christmas excesses with some hard work – plenty of digging for starters – but the weather has scuppered most of my joint keep-fit/gardening plans! I’m sure I’m not alone in thinking the recent snowfall was very pretty and I’m hoping the cold snap will wipe out some overwintering insects, but I can’t help wishing it would clear up and I can put my Sneeboer Ladies Fork to work!
But it’s not all been feet up and gardening catalogues this month. During the drier, warmer spells of the month I’ve managed to lay my hands on some wonderful horse manure for the beds; the greenhouse has enjoyed a wash and brush up and I’ve put the pressure on one of my Kitchen Garden rhubarb crowns with a traditional forcer. Read on and I’ll tell you more about January in Stephanie’s Kitchen Garden...!
Muck and Magic!
I’m a big believer in the phrase ‘preparation leads to performance’ (or words to that effect) and that’s why you could have found me standing in the middle of a field up to my knees in horse manure on a cold, grey January morning! An offer of a free supply of top quality organic matter was too good an offer to turn down and I’m sure my raised bed and open soil grown plants are going to appreciate my efforts and reward me well.
You might think that horse manure couldn’t get complicated but there are some important factors to consider when applying it to your beds and soil. Here’s my Stephanie’s Kitchen Garden checklist for you to follow;
- Only use well-rotted manure
- A mix of manure and straw is best
- Farmyard manure is low in nutrients
- Horse manure tends to be the richest of farmyard manures
- It’s almost unbeatable for improving soil structure
I finally got my digging fix by turning the well-rotted material I managed to bag up into the soil in my raised beds, open soil and borders but if you’re feeling slightly less energetic and can get hold of the manure in the autumn, you can leave it on the soil surface over the winter. The organic matter will help protect the soil structure from the ravages of winter and our old garden friend the earthworm will do the incorporating for us, dragging the material into the top layers of the soil. Improved water retention, better drainage and improved levels of humus – here I come!
 Clean House!
Like most gardeners, I consider my greenhouse to be one of the biggest assets in my Kitchen Garden. This little oasis of heat and light is the nerve centre of all my Kitchen Garden growing activities and to say I would be lost without it is no understatement. The protection offered by the structure lets me start off seedlings whenever I like really, ensures a fresh supply of tomatoes and peppers right into the depths of autumn and gives me so much more flexibility when it comes to growing. Not only that, but it’s the perfect place to test out all the little greenhouse gadgets for possible inclusion in our Harrod Horticultural product range.
As I rely on my Kitchen Garden greenhouse so much, I’ve no qualms about giving something back when it’s enjoying a well deserved rest at this time of year. Last month saw me pull on my gloves, find a brush and dilute some of the Concentrated Greenhouse Cleaner into a bucket of warm water before giving the glass and framework a good scrubbing. This stuff is great; as well as being completely natural, it’s also a disinfectant and although the greenhouse was a plant-free zone during my cleaning operation, I know I can use the greenhouse cleaner for spot cleaning in the summer at no risk to my plants.
During the annual scrub down, I paid particular attention to the little crevices and recesses between the frame and panes, a well known haunt for overwintering pests such as red spider mites, mealy bugs and other greenhouse ghouls just waiting to get their teeth into my seedlings! I’ve also got a soil border in my Kitchen Garden greenhouse – great for tomato plants! – so I also took the opportunity to add some new organic matter and topsoil, checked the autovents, cleaned the pots and seed trays and threw out 20 slugs! Phew!
Force Field!
I’m itching to get on with some ‘proper’ gardening in my Kitchen Garden but the nearest I’ve come so far is encouraging one of my rhubarb crowns to produce the tender, pink stems earlier than nature intended, thanks to my trusted old forcer. Made of terracotta and with a handy little lid for checking on progress, my forcer looks the part and I’m always in a rush to pop it over one of the crowns as early as possible. It’s a win/win situation for me; the forcer is an attractive addition to the garden and I can’t think of anything to beat the taste of those sweet pale rhubarb stems once they’re ready! 
Just like horse manure, you wouldn’t put forcing rhubarb down as being complicated but there are a couple of things to look out for. As I’m in the mood for checklists in this Stephanie’s Kitchen Garden Diary entry, here’s another for you;
- Different rhubarb varieties require a certain number of cold units to break their dormancy and render the crowns ready for forcing and although these units can be carefully calculated commercially, I can’t begin to start working that out in my Kitchen Garden. Instead, like all gardeners, I’m banking on the recent Arctic blast to stir my rhubarb into action and popping on the forcer anytime after mid-winter usually brings results.
- You don’t need to pile up manure round the base of the forcer. Seakale benefits from the extra heat the manure generates but rhubarb just doesn’t need it. Shame that – I’ve got plenty of manure spare...!
- Don’t force the same crown two years running and don’t harvest any more stems from the forced plant
- Use crowns that are 2 or more years old
I’m already starting to think about that crumble I’ll be making and enjoying in a couple of month's time!
And it’s not just my Kitchen Garden that’s ‘enjoyed’ an interrupted start to the year. Head Gardener Dave, snow-bound superintendant of the formal gardens which surround my Kitchen Garden, has been alternating between indoor tasks such as servicing tools, mowers and sharpening up his secateurs in preparation for a sharp start to 2010, with outdoor jobs – such as re-arranging my Kitchen Garden composting area, shredding large and tough plant material for composting and generally trying to keep warm. He’s managed to create a handy stockpile of wood chippings and sawdust from some chainsaw pruning he’s been undertaking and this will be prove to be an invaluable ‘brown’ to the excess of ‘green’ composting material we always generate – ideal for soaking up excess moisture.
It’s inevitable that the weather will consign you to the potting shed, greenhouse or staring forlornly out the patio doors at some stage over the next month or so, but use that time wisely. How? Here’s an idea – why don’t you contact Harrod Horticultural’s very own garden pest control expert Julian Ives with any of those nagging pest problems you encountered last year?
Julian’s heading up our brand new Natural Choice range of completely organic pest control products – safe to use around children, pets and wildlife – and it’s an odds-on bet he’ll be busy once the massed ranks of aphids, caterpillars, whitefly and all the other usual suspects start crawling out the woodwork once the temperature creeps up. Get your query in now – either by e-mail or letter – and get expert preventative advice before things go wrong!
We’ve also produced our very own FREE Pest Guide entitled the Little Book of Pests; an invaluable, 24-page ‘keep handy’ guide packed full of information on garden pests and the organic Natural Choice range of products with which to successfully control them. You can download a copy (PDF version, 2.65MB) instantly - it helps to know what you’re up against and what do!
![]()


