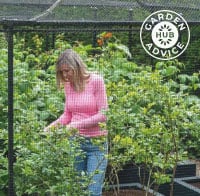
STEPHANIE’S KITCHEN GARDEN UPDATE – MARCH 2010
Talk about one step forward and two steps back! Spring arrived in Stephanie’s Kitchen Garden for all of four days but right now, as we reach the business end of the month, it seems to have retreated firmly back into its shell! The calm days and warmth of the sun have been replaced with driving winds, rain and the unwelcome return of the phrase ‘wind chill factor’. Still, it’s unpredictable weather like this that presents a challenge to us gardeners and it makes me appreciate my kitchen garden greenhouse even more!
March has seen me busy giving the kitchen garden strawberries a bit of a haircut; I’ve been busy planting out my well-chitted potatoes and given then a flying start with a few handfuls of fertiliser; my seed sowing’s been going very well and I’m already planning my Ladder Vegetable Garden. But first, let me tell you just how good my greenhouse looks...!
Setting the Stage
My greenhouse is most definitely the headquarters of Stephanie’s Kitchen Garden. It’s a busy, bustling place and quite often reminds me of an airport departure lounge; there are plants stopping over for the night during their stint of hardening off; trays of seedlings are forever flying in and out and the border is home to summer favourites such as tomatoes and peppers. Earthboxes are pushed around like luggage trolleys and it’s generally a busy, bustling place to be for almost 12 months of the year. 
I’m a great advocate of starting seeds off in a controlled environment like a greenhouse – I don’t have much choice given that the local mouse and bird population have developed a taste for my seeds and plants - and it’s also the perfect venue for testing out the various propagators, heaters, watering kits and many other pieces of equipment we feature in our Harrod Horticultural catalogue. But I’m particularly excited by the arrival and assembly of my latest greenhouse addition – a brand spanking new, shiny set of aluminium staging!
I can’t stand jumble and mess and especially not in the greenhouse, where as far as I’m concerned a disorganised and untidy venue is an open invitation to any old passing garden pest or disease – and that’s where the clutter-busting greenhouse staging comes in! The two tier option I’ve gone for provides me with both a comfortable work surface (ideal for potting, standing out seed trays and propagators) and an invaluable lower shelf where I can keep all my watering cans, fertiliser, seed sowing compost, seed trays, string, ties, labels and the hundreds of other bits of greenhouse stuff you just can’t do without.
As the greenhouse staging has been researched, designed, developed and manufactured in our own factory, I know it’s going to be up to the task. I’m also well aware that there are plenty of weak, wobbly and precarious greenhouse staging units around that look like they’re permanently on the brink of collapse, and that our staging isn’t one of them! Not only does our staging come with bracing bars for extra rigidity and strength, but it’s been through a load bearing test involving more than a fair few bags of compost – and as it passed with flying colours (77kg per module - see image below and the article on our Garden Forum) I’ve got no qualms about its ability. Now all I need to do is tidy up!
Spuds Away!
After a successful spell of chitting (plenty about that in last month’s update), I’ve just waved goodbye to the potato class of 2010 – at least for a few months anyway! Planting potatoes is one of those jobs in the garden that reminds you why you’re out there; plenty of good old fashioned digging, the anticipation of a bumper crop from every tuber you plant and as I’m as big fan of the earthing up way of growing, the knowledge that I’m following in the exact wellington boot prints of generations of gardeners. Here’s my Stephanie’s Kitchen Garden Guide to planting potatoes;
• Mark out your rows, leaving a good 60cm (2”) between them. Increase this up to around 70cm for second early varieties onwards.
• Dig a planting hole around 15cm deep and loosen up the soil at the bottom. It’s one of my techniques to throw in a handful of potato fertiliser and mix it in with the soil you’ve just disturbed, making sure the fertiliser granules don’t come into contact with the tubers.
• Pop a potato into the planting hole making sure the chits are pointing upwards.
• Gently backfill the planting hole and scatter another generous few handfuls of fertiliser onto the row.
• Carefully loosen the surrounding soil (the Sneeboer Long Handled Cultivator was made for this job)!
• Finally, draw a little soil into a ridge directly on top of the row. This is the start of the almost continual earthing up process and helps mark the row, protect the tubers from frost and most importantly, it looks good!
You’ll find that the constant cultivation helps incorporate the fertiliser granules as well as giving the soil in the bed a good work over – and you get a good work out as well! I’ll let you know how my potatoes get on as once the planting is over, there’s not much to do until the foliage starts to appear. More about that next time...
Strawberry Short Back and Sides!
Regular readers will know just how highly I cherish my Kitchen Garden berry fruits and there’s not a summer’s morning that goes by without a few raspberries or strawberries accompanying my breakfast cereal – it’s what home grown produce is all about! Thoughts of those taste bud-tingling summer breakfasts meant there was no chance of neglecting the Kitchen Garden strawberries and after leaving the foliage in place all winter, the time has arrived to give then a decent haircut!
Although the dead leaves look a bit of a mess, they do a valuable job of protecting the crown from frost. Fingers crossed, the frost season is slowly passing us by and with the strawberry crowns showing signs of stirring, I decided it was time to set up a mobile hairdressing salon!
Wielding my trusty Felco secateurs like some horticultural Sweeney Todd, off came all the straggly leaf remnants, withered runners and any old fruits (not many of those were left, I can assure you!) to leave a bare but healthy looking plant. Hopefully the increased air and light afforded to the plants by my hacking will further encourage the crowns to grow and a bit of thinning – I’m trying to leave no more than four crowns per plant – will set the scene for a bumper crop.
Strawberry aficionados like me, who are also short on patience, will also be rushing to cover some of their plants with a cloche or insulating fleece. This extra protection could advance the first fruits by up to a week which is very good news – I’d be happy with a day!
Ladder Vegetable Garden
I’d love my Kitchen Garden to be bigger but where that just isn’t feasible, or you haven’t got the luxury of vegetable growing space to start with, then a Ladder Vegetable Garden is certainly an option. Don’t go thinking you’ve got to risk life and limb climbing up to some precariously positioned roof garden; the name has been coined from the rung-like design which gives you almost a square metre of valuable vegetable growing space in a footprint of under 70 square cm!
I’ll be positioning my Ladder Vegetable Garden on the patio but I’m already thinking ahead to harvesting the quick growing rocket and spinach I’ve been sowing in the three lift-out growing trays – another major benefit of the set-up! I’ve placed the trays in the greenhouse (on my new staging of course!) and once the seedlings take hold, and I’ve hardened them off, I’ll be moving all three of them down to the growing frame which Head Gardener Dave is kindly assembling for me.
It’s this ease of planting, space saving and growing flexibility which has drawn me to the Ladder Vegetable Garden and hopefully, with a bit of carefully planned succession sowing, it’ll keep me in fresh salads for the whole year!
Apart from putting my Ladder Vegetable Garden together, Head Gardener Dave, the spring-welcoming Sergeant Major of the formal gardens which surround my Kitchen Garden, has also tackled assembly of an Extra Wide Garden Arch. Positioned across the entrance to Stephanie’s Kitchen Garden, the 1.7m wide arch forms the perfect gateway to the garden and I’m still busy contemplating what to grow up the mesh trellis which comes with it.
Not content with assembling all my new Kitchen Garden additions, Dave has also been pushing forward his ground cover and shingle pathway programme, along with emptying out any of the various compost heaps, bins and tumblers I’ve got in the Kitchen Garden composting area.
I always like to start composting afresh in spring and any material which hasn’t fully composted has been added to a traditional bin, with the more mature stuff going on the garden – plenty of it in my bean trench! I’ll save up vegetable peelings and general kitchen waste fit for composting and when I’ve collected enough, I’ll fill a Compostumbler right up and shut the door!
Dave’s had to combine his outdoor activities with preparing the lawnmower and scarifier for use under cover thanks to the very changeable weather and much as though we’d all like to be, we can’t spend every day in the garden at this time of year. That’s why it’s a great time to dodge the showers by heading indoors and firing up the PC to browse our very popular Garden Forum, packed full of gardening advice and features. I’m almost guaranteeing you’ll pick up some information or tips you can use in the garden and I’m certainly not going to be held responsible for any colds you might develop if you head outside again immediately to put them into practice and get soaked!
Hopefully April will bring warmer and more settled gardening weather but in the meantime, swap your trowel for a mouse, explore all the online support we’ve got for you – including the Pest Buster himself, garden Pest Control expert Julian Ives – and prepare for the spring proper!
![]()


